
This is it. The final step to setting up your very own blog. Are you excited yet? You should be. Although it sounds complicated, this step the second easiest step to setting up a blog, right behind verifying if the domain name and host are working correctly.
- To install WordPress, login to your cpanel account at http://www.YOURDOMAIN.com/cpanel/ — if your domain isn’t active yet, refer back to the second email from HostGator to figure out how to access your cpanel account.
- You will now be at your website’s control panel. This will provide you with all of the necessary information about your website and it will allow you to make any necessary changes. For now, scroll down to the bottom and click on the ‘Fantastico’ icon.
- Fantastico will allow you to effortlessly install and upgrade a number of different programs. Today, we will use Fantastico to install WordPress. It is located under the ‘Blogs’ header on the left hand side.
- This is the WordPress section. It will list all of your current WordPress installs for all of your websites. Choose ‘New Installation’ to proceed.
- Here you will be given quite a few options, so use the image below and the numbers to guide you through this step.
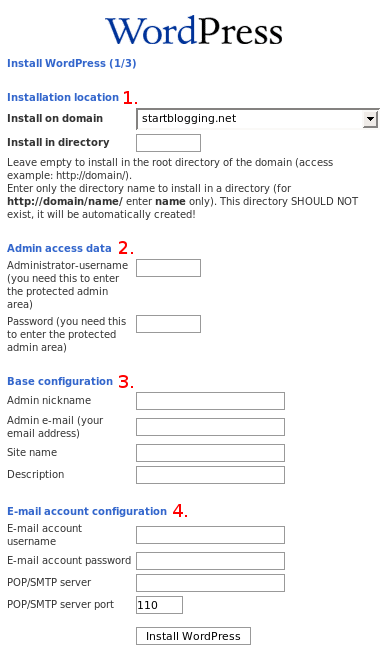
- This should already be selected as your domain and will not need to be modified.
- Choose a username and password for your blog. This username and password will be used to access the administrative side of your WordPress installation.
- Here you can configure some general options of your blog. ‘Admin nickname’ will be the name displayed whenever you make a new post. ‘Email address’ will be the email address that will allow your visitors to get in contact with you.
- Site name and description are self-explanatory. Use these fields to describe your blog.
- Email account configuration should already be filled out for you. All you will need to do is select a password.
- In this step, you will be asked to verify all of the previous information as well as authorize any database changes. The message should look like this:
Install WordPress (2/3)
The MySQL database and MySQL user — will be created and used for this installation.
– You chose to install in the main directory of the domain YOURDOMAIN.com.
– The access URL will be: http://www.YOURDOMAIN.com/.Click on Finish installation to continue.
Click on Finish and the installation will complete.
- You will receive confirmation that everything went according to plan and your blog will finally be set up!
If you followed these steps and received no error messages, you will be able to access your new blog by typing in your domain name. The resulting page should look a little like this:
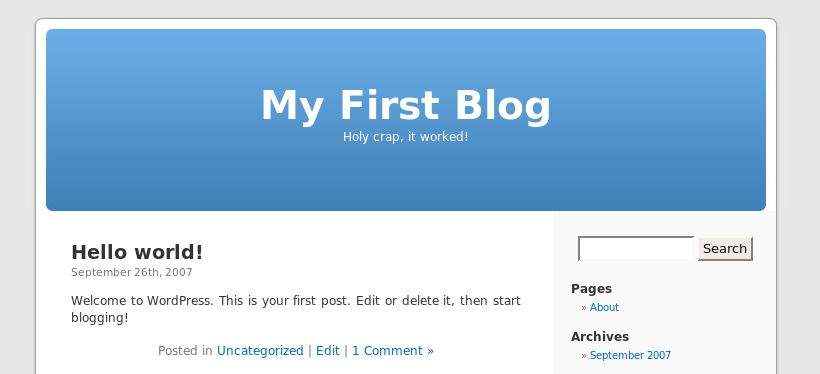
Your blog is working, but it needs a little flavor.